
Quickly Learn to use SIX ERP
Customer Management
Customer Management
Introduction
Client - or Customer Management concludes the entire flow of managing Leads (potential Clients, prospects) and Customers. However, managing Customers is not solely about data and recordkeeping of data entities.
A Customer is regarded a data entity with wide interconnections into the sales process, and due to its many contact points with other functional entities it is much more than a few lines of contact information.
Below Diagram outlines a typical flow of actions, from Customer Aquisition to final Sale.
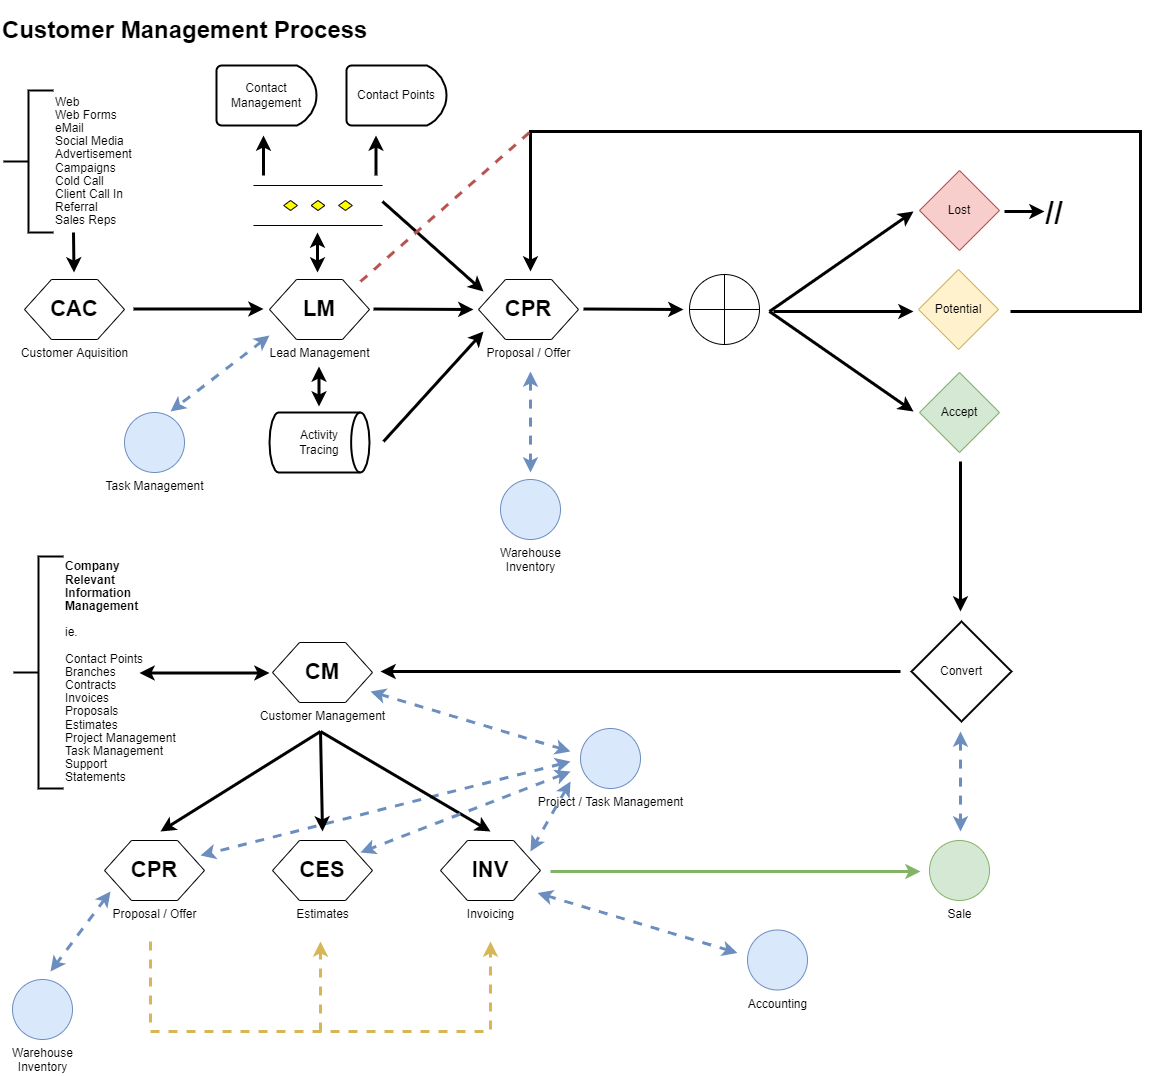
While Customer Management refers strictly to Customer Data, the management process overlaps largely with other data entities.
Please refer to the other entities separately for reference of sub-processes and management of these entities.
Customer Dashboard
To get an overview of all Customers click on the customer's menu entry in your left side menu, and then select the "Customers" entry. Alternatively, press the key combination ALT + C to get to the customers' dashboard.
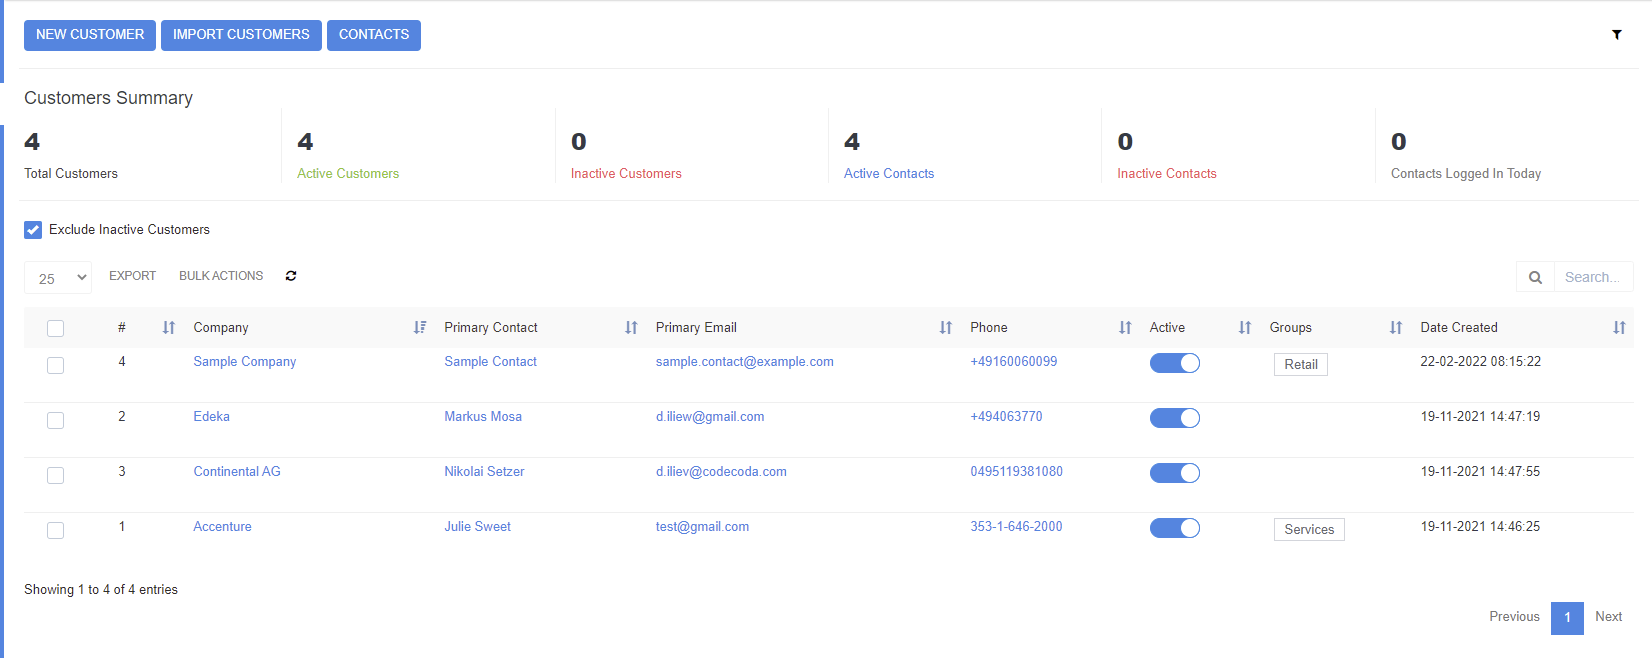
Within the dashboard, you can easily see Customers, search for a customer by a company - or contact name. You can create a "NEW CUSTOMER" by clicking on the respective button, "IMPORT CUSTOMERS", or see an overview of all "CONTACTS".
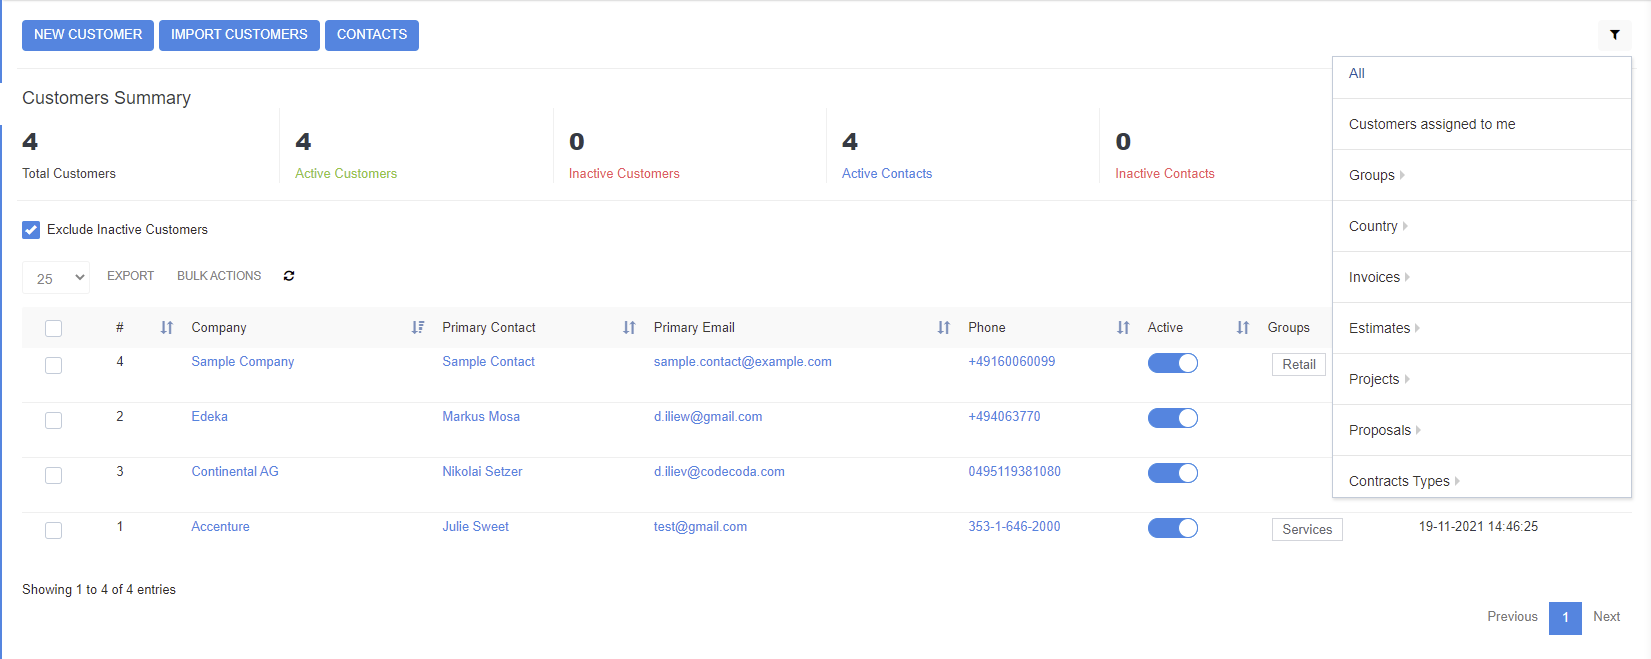
For Filtering purposes, you will find several pre-made filters in the top right corner by clicking on the ![]() icon. A filter dialog will expand and allow you to drill further down based on various criteria into your customers' data.
icon. A filter dialog will expand and allow you to drill further down based on various criteria into your customers' data.
Adding a new Customer
Managing Customers is generically simple. For starting to create a new customer record you can:
A) Select the Customers menu from the left side menu and click on the sub-item Customers. In the opening, screen click on the "New Customer" button.
B) Click the SHIFT + C keys on your keyboard which will open the new Customer dialog from any place inside the system.
C) Click ALT + C on your keyboard and manually select the "New Customer" button.
Deleting a Customer
On the left side beside each Customers name, you will see a checkbox ![]() . Tick the checkbox
. Tick the checkbox ![]() and select "BULK ACTIONS". Select "Mass Delete" by ticking the check box in the opened dialogue.
and select "BULK ACTIONS". Select "Mass Delete" by ticking the check box in the opened dialogue.

Once you confirm the action the selected customers' records, inclusive all attached information is removed permanently.
Deactivating a Customer
Imagine the case that you are maintaining hundreds or even thousands of customers. Commonly not all Customers will be active, for whatever reason. Working with a cluttered customer list can be a burden. Therefore, you can easily de-activate a customer.

Click on the "Active" switch to disable the Customer to appear on your clients' list. If you later need to find the deactivated client you can do so by using filters, accessed by unticking ![]() the checkbox "Exclude inactive Customers."
the checkbox "Exclude inactive Customers."
Customer Data Management
Minimum Information of a Customer Record
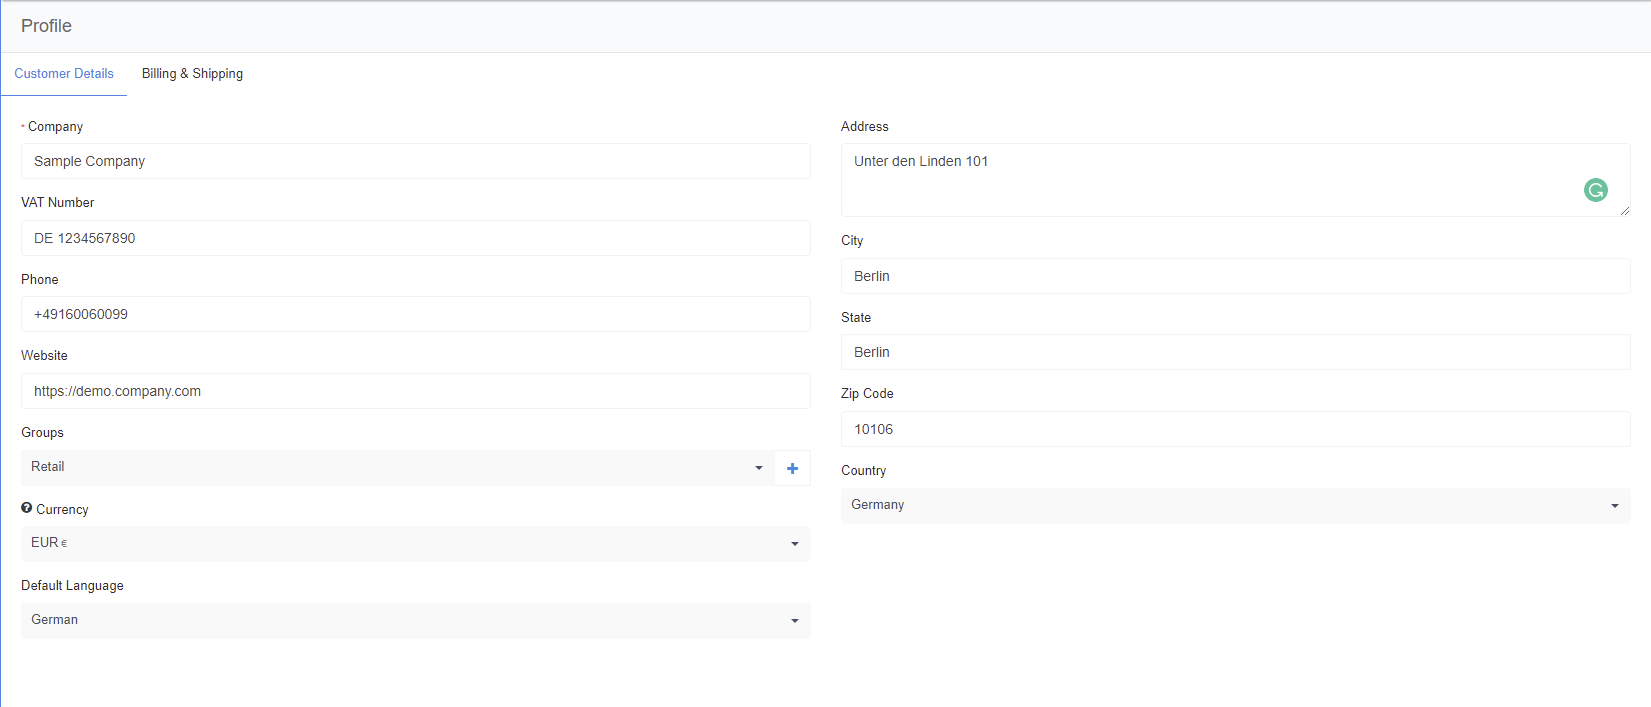
We recommend maintaining as complete records as possible. The bare minimum information a customer record needs to contain is the companies name. In case you will be using the customer for Billing purposes, you should also fill the respective Billing tab - or choose "Same as Customer Info" to automatically fill the fields.

Once all the information has been added click on "SAVE" to just store the profile, or on "SAVE AND CREATE CONTACT", in order to add one or more client contact details. Once you "SAVE" the information you will be presented with the full client card, in which you can see a complete overview of the customer data, inclusive touchpoints like invoices, proposals, estimates, contracts aso.
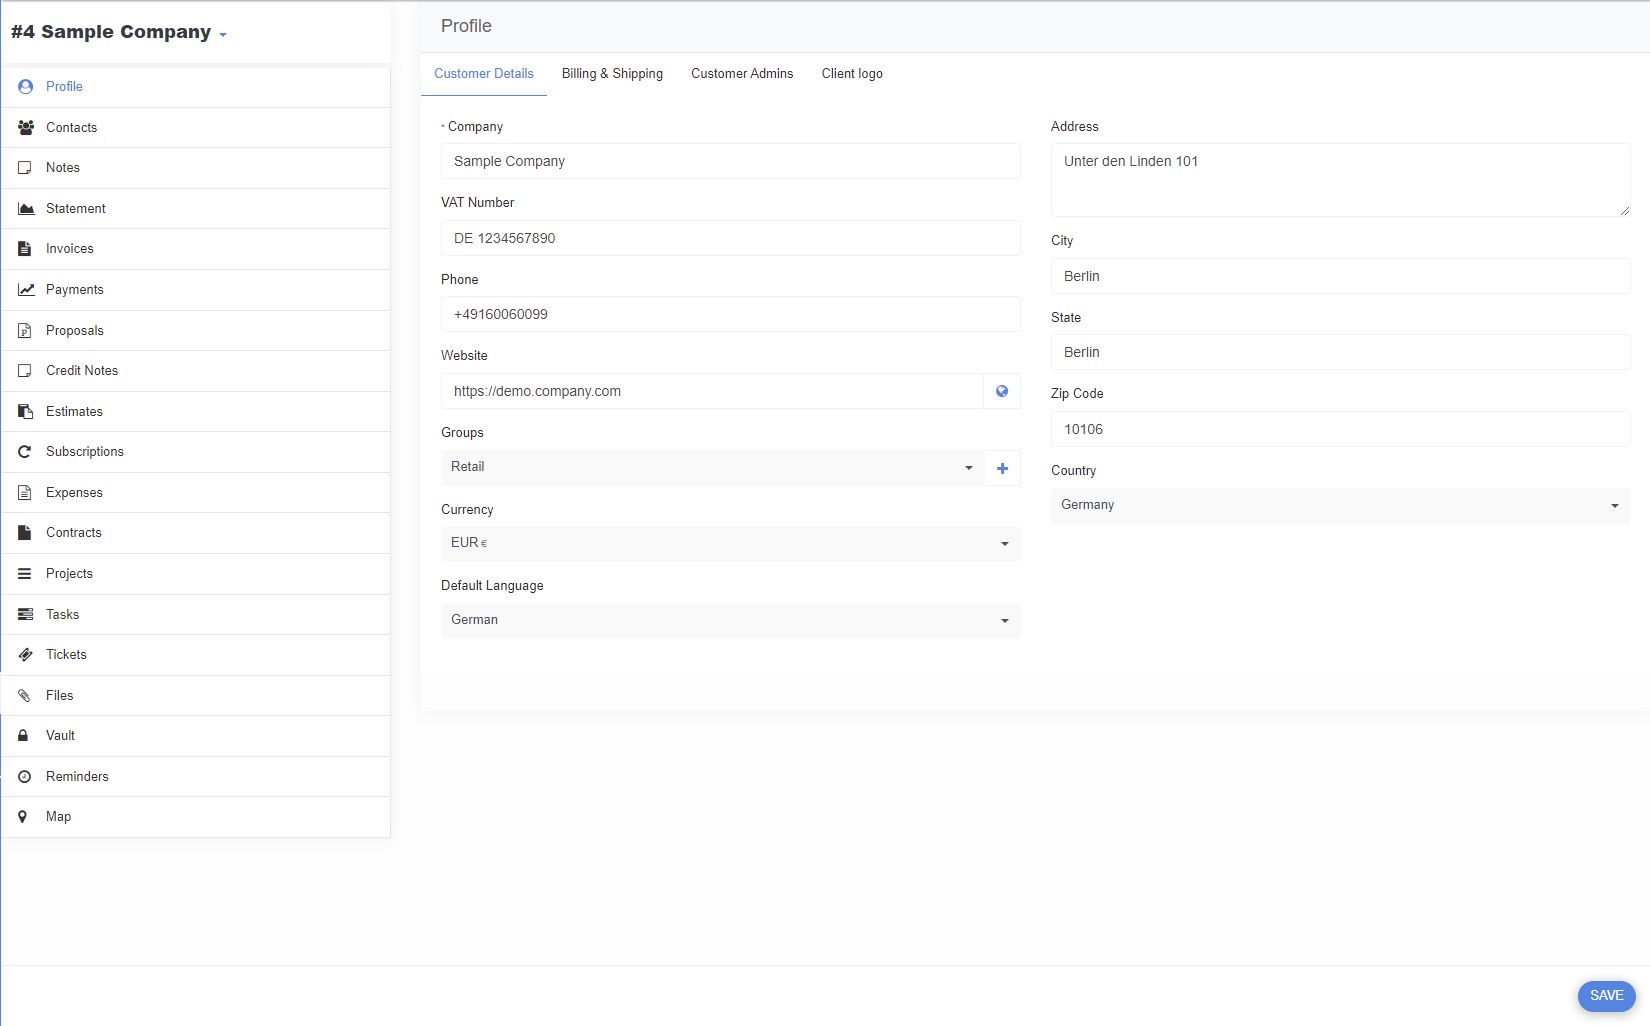
Editing a Customers Record
Once a customer is created, you do have access to a whole new set of information related to the Customer. You can edit any customer from the Customer Dashboard by hovering over the Customers name and clicking on it.

Adding Client Contact Details
While a customer record contains the details of a company (the entity), contacts refer to physical people working at the company. Client Details act as the physical entry point into the company. Each Company should have at least one contact person.
To add a Client Contact, click on "Contacts" and follow the button "New CONTACT"

You will be presented with a dialogue for entering the contact details. There are also several settings, which control permissions you wish to give the client (or the contact person) related to the Customer's own dashboard in SIX.
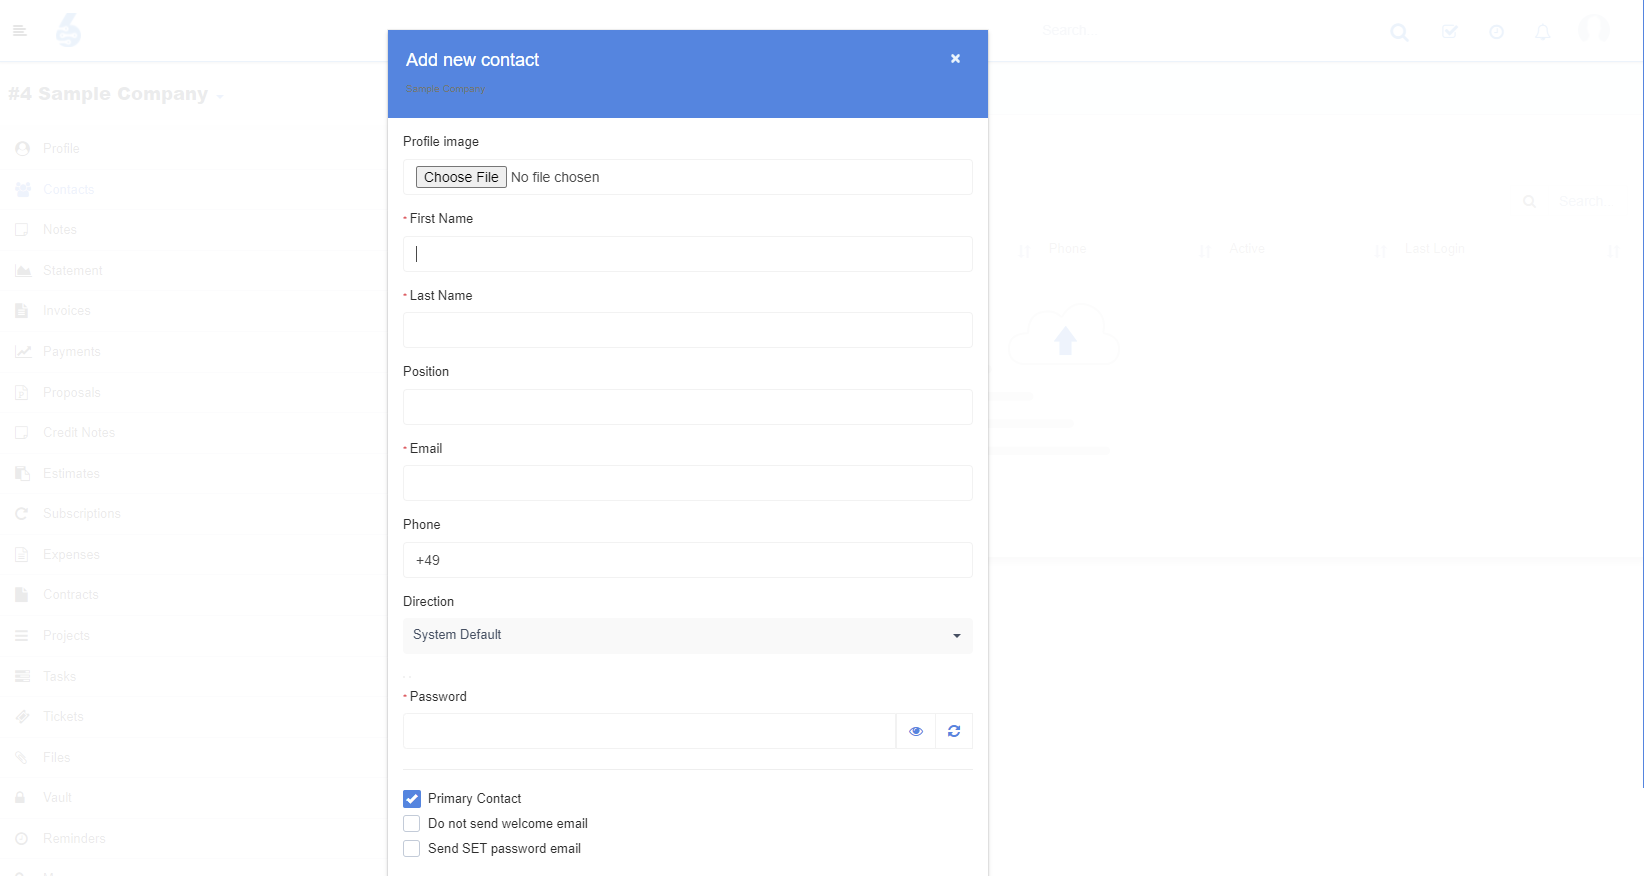
The bare minimum information a Contact Record needs to contain are:
- Firstname
- Lastname
- Email address of the Contact
You may add also other data such as the Phone number of the Contact.